Overview
This “Pano2VR” tutorial will take you through the steps on creating a custom skin with the ability to blur and desaturate the current node panorama. The effect, activated by an Action in the skin, applies CSS Filters, Blur and Grayscale, to the current node panorama. A simple tint option is also available.
Note: this effect can be used with popup elements such as Information popups to reduce the presence of the panorama and enhance the visual representation of the popup as shown in the following examples (Figure #1 & Figure #2)
Figure #1: Information popup on a node panorama using a simple tint background.
Figure #2: Information popup on a node panorama modified using a tint background and a Blur and Grayscale CSS Filter effect
Skin interaction with a node panorama is quite limited, at the moment. In the Skin Editor, actions that target Panorama movement such as Pan/Tilt/FoV attributes or Projections such as Rectilinear, Stereographic or Fisheye, can be applied, but that’s about it.
Note: Outside of the skin you can set a double click action to toggle Fullscreen in the Output/Control/Control/Double-Click: section.
This means we cannot apply the CSS Filters to the node panorama as it stands. So rather than target the node panorama directly we will create a skin element that contains another instance of the node panorama and apply the CSS Filters to it.
To do so we will be using features including; Direct Node Access, Custom Node ID’s, CSS styling, Variables, Timers and iFrames.
Note: this tutorial is designed for Pano2VR V6.1.2 You can download the software here. A working knowledge of Pano2VR is an advantage when doing this tutorial.
Final Output
The tour below is a sample of the output from this tutorial.
Tutorial Files
In the tutorial folder, Blurred-Panorama-Background, there is an Asset Folder with two equirectangular files ‘Dubrovnik-Walls.jpg’ and ‘Velimir-Stanic.jpg’ and a CSS file ‘blur-grayscale.css’. There is also a Project folder with a Pano2VR project 'blurred-pano-bg.p2vr', a skin 'blurred-pano-bg.ggsk' and an Output Folder called 'Blurred-Pano-BG' with project files created from the .p2vr and .ggsk elements. (Figure #1)
Note: The equirectangular images supplied with this tutorial are copyright Tony Redhead 2020 and not to be used or modified in any way without the express written permission of the author.
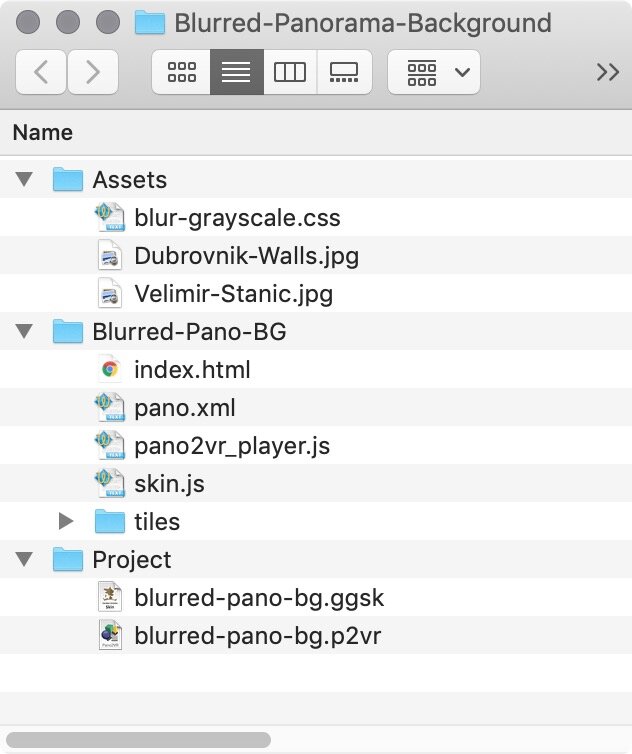
Figure #1: Tutorial Folder
Project Overview
In this tutorial we will modify the blurred-pano-bg.p2vr project file by;
Adding Custom Node ID’s
Enabling Direct Node Access
and the blurred-pano-bg.ggsk skin by:
Adding an iFrame that loads another instance of the node panorama
Apply CSS Filters
Add a Screentint
Add an Impermeable element
Add a Timer
Add Logic Blocks and Actions
Note: this tutorial assumes a basic knowledge of Pano2VR V6
Note: click on any image in the tutorial to enlarge it
Getting Started
1. Download the zipped tutorial folder here (41mb)
2. Open the project file ‘blurred-pano-bg.p2vr’ (Figure #3)
Figure #3: Tutorial Pano2VR Project
Adding Custom Node ID’s & Enabling Direct Node Access
Note: Using a Custom Node ID provides more flexibility than using the default node ID, especially if the need arises to move the order of the nodes within the Tour Browser
1. Select the first node in the Tour Browser to highlight it'
2. In the User Data window enter the name ‘walls’ in the Custom Node ID field.
3. Repeat with the second node and enter ‘artist’ in the field (Figures #4 & 5)
Figure #4: First node
Figure #5: Second node
Note: Direct node access (DNA) allows us to link directly to a node by using it’s Internal Node ID, or in our case, Custom Node ID.
DNA is not automatically enabled; the following steps show how to enable it.
4. Click on the ‘Edit Template’ button in the Output/HTML dropdown
5. In the HTML Template window check ‘Direct node access:’ and select ‘OK’ (Figure #6)
Figure #6: Enable Direct node access
6. Save and publish the project
Note; now that DNA is enabled, by appending the hash character and the Custom Node ID at the end of the URL: http://projectname/index.html#artist you can reference that node directly (Figure #7)
Figure #7: The second node opened via the DNA #artist
Adding the iFrame
Note: as discussed earlier we can not directly affect the node panorama with our CSS Filters.
We don’t want to create a still image, to use as a reveal above the node panorama, as we cannot match the pan/tilt/fov of the underlying image; also we don’t want to create a whole new project, as that would increase the size and complexity of the project, especially with a large number of nodes.
Instead we will create a Duplicate Instance of the project by adding the existing ‘index.html’ into an iFrame that sits above the node panorama. We will match the nodes using Direct Node Access and the Custom Node ID’s and match the Pan/Tilt/FoV by appending placeholders for those attributes in the URL.
Click on the Edit Skin button to open the skin editor (Figure #8)
Figure #8: blurred-pano-bg.ggsk
1. Click on the ‘eyes’ next to each layer of the tree to temporarily hide the contents of the tree
2. Select ‘Draw Text Field’ from the main menu and click once in the Canvas to add the element (Figure #9)
Figure #9: Text box added to the skin
3. With the Text 1 element selected set the following Properties:
Position: ID: = txt_iFrame | Anchor: = center | Position: X: & Y: = 0 | Size: Width: & Height: = 50.00 percent
Note: the reason we are setting the size at 50% will become evident later in the tutorial as it’s easier to apply a Timer to an area we can drag around than one that fills the canvas.
Rectangle: Background: Enabled: = unchecked | Border: Width: = 0
Text: Text: = <iframe src="index.html#$(ucnode),$(ap),$(at),$(af)" width="100%" height="100%" frameborder="0" scrolling="no" ></iframe> (Figure #10)
Advanced: Permeable: = checked
Figure #10: txt_iFrame properties
Note: the (ucnode) is a placeholder that loads the current Custom Node ID and (ap), (at) and (af) are placeholder that load the current pan, tilt and fov respectively
4. Save and close the skin
5. Publish the project (Figure #11)
Figure #11: Node panorama and iFrame version
Note: The published project shows both the node panorama and duplicate instance in the iFrame. If you rotate the node panorama the iFrame will update to match the Pan/Tilt/FoV attributes. If you click to the next node, from the node panorama, it will display the Velimir panorama.
Applying the CSS Filters
Note: now that we have the alternate panorama loading we can apply the CSS filters to it. In this section we will add the CSS file to the skin and add a variable to manage the classes.
The CSS file blur-grayscale.css has two classes the first is .blur and the second is .blurgray.
Blurgray combines both the blur and a grayscale filter together (Figure #12)
Figure #12: CSS Filter file
1. Copy the blur-grayscale.css file into the Blurred-Pano-BG project folder
2. Open the Skin Editor
3. In the Variable section double-click in a blank field to add a new Variable and enter the following properties:
Name: = my_iframe_class | Type: = Text | Initial Value: = blur | Expose: = checked | Description: = Enter blur or blurgray, leave blank for tint (Figure #13)
Note: by checking Expose and Description the variable can be changed when publishing the project via the Output/Skin: /Edit Skin Configuration button rather than having to re-edit the skin
4. In the Properties/External Files section double-click in the Type section and add a Type = CSS and in the URL section add URL = blur-grayscale.css (Figure #13)
Figure #13: CSS Properties: Variable & External Files
5. Select the ‘txt_iframe’ element and edit the text by adding in the following; class =”$(*my_iframe_class)” after <iframe (Figure #14)
Note: make sure that the double quote signs are straight quotes not curly ones. If you are not seeing the blur this may be the cause.
Figure #14: variable added to iFrame code
6. Save the skin
7. Publish the project (Figure #15)
Figure #15: Node panorama and blurred iFrame version
Note: The published project shows both the node panorama and the blurred duplicate instance in the iFrame.
9. To view a grayscale version, click on the ‘Edit Skin Configuration’ button in the project window and enter the value 'blurgray’ and click on ‘OK' (Figure #16)
Figure #16: Setting the skin parameters for the Variable my_iframe_class
10. Publish the project (Figure #17)
Figure #17: Node panorama and blurred grayscale iFrame version
Note: The published project shows both the node panorama and the blurred grayscale duplicate instance in the iFrame.
Adding a screentint to the iFrame
Note: If no CSS filter is defined the default result will be a screentint similar to the one that comes with Pano2VR popup components.
1. In the Skin Editor menu click on ‘Draw Rectangle’ and click once in the skin to add it
2. With ‘Rectangle 1’ selected set the following Properties:
Position: ID: = rect_screentint | Anchor: = center | Position: X: & Y: = 0 | Size: Width: & Height: 50.00 percent
Appearance: Alpha: = 0.500
Note: if you find the screentint is too dark you can come back and change the Alpha to lighten it.
Rectangle: Background: Enabled: = Checked | Color: = Black | Border: Width: = 0
Advanced: Permeable: = Checked
3. Add a logic block to the rect_screentint element on the following Property;
Note: this hides the screentint when either blur or blurgray is active. If you want a tint to show over the blur set the Visible in the logic block to = True
Appearance: Visible:
Trigger: = *myiFrameClass | Comparison: = | Value: = blur | Or
Trigger: = *myiFrameClass | Comparison: = | Value: = blurgray | Visible: = False (Figure #18)
Figure #18: rect_screentint visible logic block
4. Save the skin
Adding an Impermeable Element to the iFrame
Note: At this point the node panorama and iFrame are still interactive. Once the popup has triggered the CSS filter we don’t want any interaction with the panorama and need to disable any interaction by adding an impermeable element that resides above the txt_iFrame and rect_screentint elements
1. With ‘rect_screentint’ selected right click it and select ‘Copy’ (Figure #19)
Figure #19: Copy rect_screentint
2. Right click outside the tree and select ‘Paste Element’ (Figure #20)
Figure #20: Paste Element
Note: you will now have two copies of the rect_screentint element
3. Select the topmost ‘rec_screentint’ and set the following Properties:
Position: ID: = rect_impermeable
Appearance: Alpha: = 0.002 | Visible Logic Block = delete
Rectangle: Background: Enabled: = Checked | Color: = White | Border: Width: = 0
Advanced: Permeable: = Unchecked
4. Save the skin
Note: if you republish the project you will see that there are no mouse actions while your cursor is over the iFrame. Once you move off it you can pan the underlying node panorama
Combining the iFrame elements
Note: the next step is to combine the three iFrame elements into Container. This will make them easier to manage within the skin.
1. Shift select the 3 elements; rect_impermeable, rect_screentint and txt_iFrame
2. In the menu click on ‘Draw Container’ and click once into the canvas.
Note: the elements are now inside the container and are children of Container 1 (Figure #21)
Figure #21: Container 1 and the child elements
Note: the child elements are in the wrong stacking order so we will reorder the elements. They also appear to be smaller because they are set to Height and Width of 50% so they are resized relative to the Container 1 dimensions.
3. Reorder the child elements by dragging them in the tree so that the order, from top to bottom is: rect_impermeable, rect_screentint and txt_iFrame
4. Shift select all 3 elements and set the following Properties:
Position Position: X: & Y: = 0 | Size: Height: & Width: = 100 percent
5. Select ‘Container 1’ and set the following Properties:
Position: ID: = cont_iframe | Anchor: = center
Advanced: Permeable: = checked (Figure #22)
Figure #22: cont_iframe and its child elements
6. Save the skin
Apply a Timer to the cont_iframe Element
Note: the next step in creating the iFrame element is to wrap it in a Timer so we can control the time between the mouse click on the hotspot and the start of the fade in
1. In the menu click on ‘Draw Timer’ and drag a rectangle around the cont_frame container (Figure #23)
Figure #23: Timer wrapped around the cont_iframe
Note: the timer fully encloses the cont_iframe element
2. With the ‘Timer 1’ selected set the following Properties:
Position: ID: = timer_iframe_show | Anchor: = center | Size: Width: & Height: 100.50 percent
Note: the Width and Height of the timer element is larger than 100% to accommodate for blur falloff on the edges of element. If the element is too small the underlying panorama may be seen on the edges
Appearance: Visible: = checked | Visible Logic Block: = deleted | Alpha: = 0.000
Timer: Type: = Manual | Repeat: = One Time
Advanced: Permeable: = Checked
Actions: Source: = Deactivate | Action: = Alpha | Type: = Change Element Alpha | Alpha: = 1.000 | Transition Time: = 2.000s | Target: = _self (Figure #24)
Figure #24: timer_iframe_show settings
Note: the result of the settings mean that once the Activation period of the timer is finished the timer will trigger the Action and change it’s own Alpha settings to 100% over 2 seconds, revealing it and the child elements within it.
The Activation period will be set later in the skin development.
3. Save the skin
Resize the iFrame Elements
Note: as mentioned earlier we have been working with the iFrame elements at a size of 50%. Now that we have wrapped the timer around the elements we can set them to their final size to fill the browser screen
1. Select the ‘cont_iframe' element and set the following Properties:
Position: Position: Size: Height: & Width: 100 percent
2. Save the skin
Set the iFrame Element Visual Logic Blocks
Note: now we need to add Actions to manage the iframe element appearance. We want to fade it in and out when a hotspot is selected/deselected.
1. Move the timer_iframe_show element below the ht_info element in the tree
2. Select the cont_iframe element and set the following Properties:
Appearance: Visible: = unchecked
3. Add a logic block to the cont_iframe element on the following Property;
Appearance: Visible:
Trigger: = *visinfopopup | Comparison: = | Value: = True | Visible: = True (Figure #25)
Figure #25: cont_iframe Visible Logic Block
4. Select the txt_iframe element and set the following Properties:
Appearance: Visible: = unchecked
5. Add a logic block to the txt_iframe element element on the following Property;
Appearance: Visible:
Trigger: = *myiFrameClass | Comparison: = | Value: = blur | Or
Trigger: = *myiFrameClass | Comparison: = | Value: = blurgray | Visible: = True (Figure #26)
Figure #26: txt_iframe Visible Logic Block
Note: this logic block ensures that the iFrame and its contents are only visible when the variable is blur or blurgray. If nothing is defined then the tint is shown without the blur/blurgray.
6. Save the skin
Set the Popup Actions
1. Click on the ‘eyes’ of the information and htinfo elements to show them in the skin
2. Select the ht_info element and set the following Properties:
Appearance: Visible: = checked
Actions:
Source: = Mouse Click | Action: = Set Value | Value: = .08 | Target: = timer_iframe_show
Source: = Mouse Click | Action: = Visibility | Type: = Hide Element | Target: = tt_information (Figure #27)
Note: the first action activates the timer for a period of .08 second, the second action hides the text title of the hotspot
Figure #27: ht_info Actions
3. Save the skin
4. Publish the project (Figure #28)
Figure 28 Popup with blurred background
Note: the final step is to set the Actions when the info popup is closed. In this case we want to fade out the blur but still have interactivity available immediately.
To do so we will add an action to the close button that sets the timer_info_show back to Alpha 0.000 over 1 second but closes the rect_impermeable immediately, allowing interactivity in the node
Set Popup Close Button Actions
1. Select the info_popup_close element and set the following Properties:
Actions:
Source: = Mouse Click | Action: = Alpha | Type: = Set Element Alpha | Alpha: = .0.000 | Target: = timer_iframe_show
2. Move it to the top of the Action list (Figure #29)
Figure #29: Info Popup Close Button Actions
3. Save the skin
4. Publish the Project
Addendum
I will be publishing an update to this tutorial that cover additional functionality and controls that let you test filters and set fade times. In addition it will also cover adding a timer to the info popup.
I will be publishing an notification of the update on the Pano2VR User Group page on Facebook and on the Pano2VR Forum
Here’s a sample of some of the effects I’ll be applying in the next tutorial.
Summary
I hope you have enjoyed the tutorial and it has helped you to achieve the best possible project outcome. If it has please take a second to consider a donation so that I can continue to add more tutorials.
