For a while now Facebook has added functionality that allows 360˚ panoramic images to be uploaded as Cover Photos. This is a brief tutorial that explains how to add your own 360˚ Panoramic Cover Photo.
Note: 360˚ Panoramic Cover Photos can only be used on Personal Facebook pages. On Business pages they will only display as an Equirectangular image.
Creating a Suitable Image
For a full 360˚ presentation you will need an Equirectangular image in the ratio of 2:1. In this tutorial I will be uploading a 6,000 x 3,000 pixel 4.3mb JPG image saved from Photoshop at a High setting. (figure #1)
figure #1: Original cover image
In order to ensure that Facebook will recognise it as a 360˚ image I recommend using Keith Martin's excellent free tool Exif Fixer, available for Mac or Windows, that you can download from http://panoramaphotographer.com/software/exiffixer/ (figure #2)
figure #2: Exif Fixer
1. Download and Install Exif Fixer
2. Lauch Exif Fixer (figure #3)
figure #3: Exif Fixer
3. Click on the 'Choose JPEG Panorama' button and browse to your image or Drag and Drop the image onto the application.
Note: if your image is not a full equirectangular you can select the "Cylindrical" option. The application will generate a set of metadata suitable for the image.
Click on the 'Add MetaData' button to add the metadata to the image (figure #4)
figure #4: Image loaded
A window, showing the MetaData that has been added to the image, will open (figure #5)
figure #5: Current exif metadata
At the same time the application will make a backup of your original image and create a new image that contains the metadata (figure #6)
figure #6: Updated images
Applying the 360˚ Image to the Cover
1. Open Facebook in your browser and browse to your Personal homepage (figure #7)
figure #7: Personal Homepage
2. Mouseover the small camera icon in the top left corner of the Cover image to reveal the "Update Cover Photo" button (figure #8)
figure #8: Update Cover Photo button
Note: There are two options for loading an image; "Choose from My Photos" or "Upload photo". In addition there are two other options available, the Reposition option doesn't work with 360˚ panoramic images and Remove will remove the current image.
3. If you select "Choose from My Photos" you will see a grid of Photo Albums and you can select a particular Album and an image from within that album. (figure #9)

figure #9: Choose from My Photos
4. Alternatively if you select "Upload Photo" you will see a window that allows you to navigate to the folder that contains your image, select it and "Open" it (figure #10)
figure #10: Upload
5. The image will upload and you will see the spinning 360˚ icon as Facebook converts it to work within it's framework (figure #11)
Note: Unlike 360˚ panoramas in the timeline there are no option to set the initial view. The initial view will be the centre of your image.
figure #11: Facebook configuration
6. Once it's converted your new 360˚ Panoramic Cover Photo will be visible to the world (figure #12)
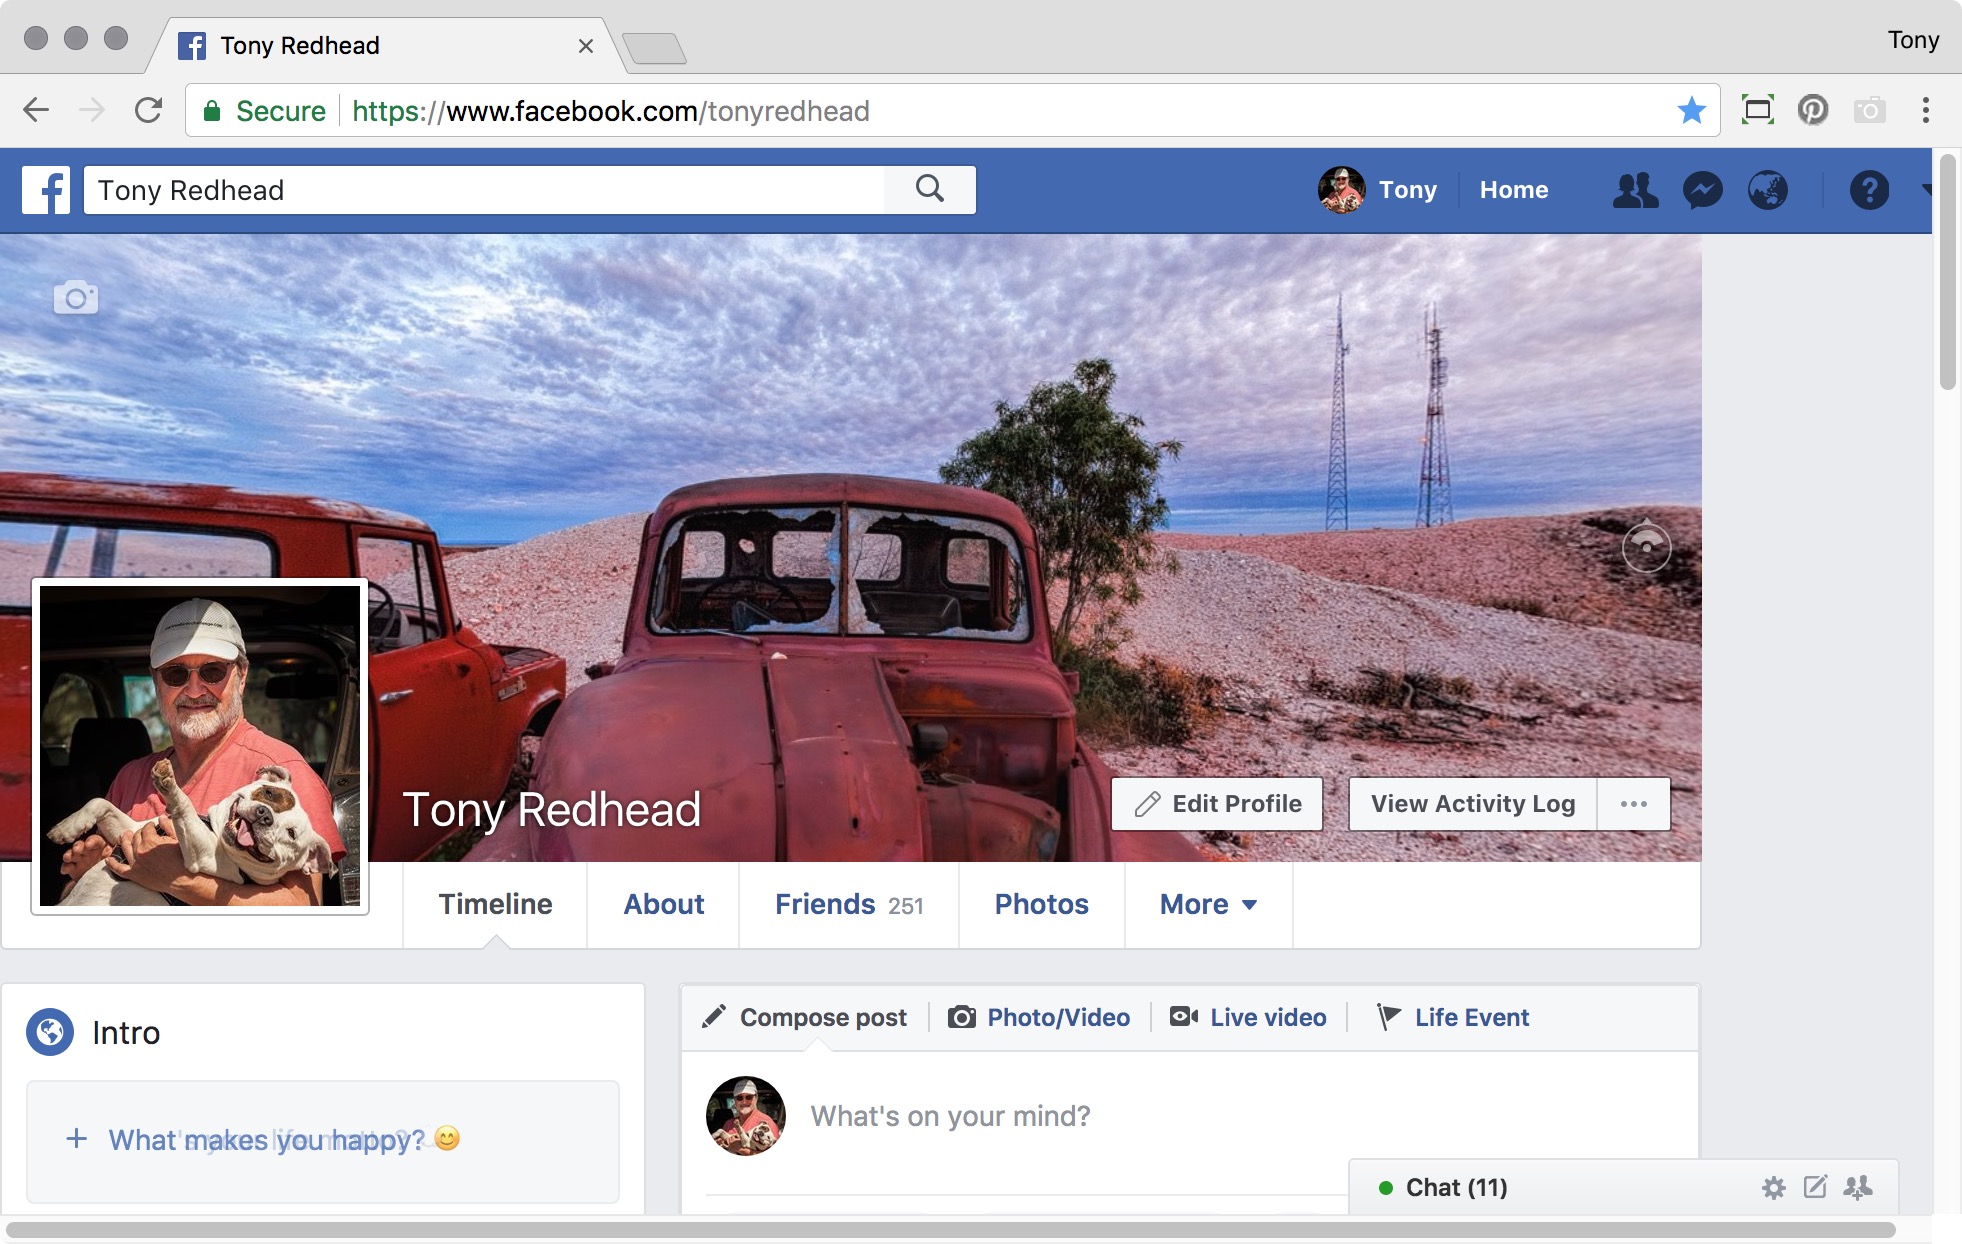
figure #12: 360˚ Panorama Cover Photo
Note: You can use the "View As..." option, found under the ... next to the "View Activity Log" button, to see how others view your personal homepage and test out the interaction (figure #13)

figure #13: View As
7. You can view the final 360˚ Panorama Cover Photo at my Facebook page https://www.facebook.com/tonyredhead

I am a proud supporter of Nodal Ninja 360˚ VR solutions. Tools that enable you to create stunning panoramas. Click the logo for more information.
