Note: this is a work in progress, and I’m learning more each day, so this information may change.
Note: to see larger versions click on the images
I’ve been working on a Pano2VR Virtual Tour project and skin with “Responsive Gallery Popups”. These popups display one or more images and descriptive text and change from landscape to portrait based on the Aspect Ratio of the browser window. As you can see in the examples below, I have automobile images for the horizontal aspect and motorcycles for the vertical aspect. (figures #1 & #2)
Figure #1: Responsive popup featuring Landscape image
Figure #2: Responsive popup featuring Portrait image
For context here is a short video showing how the Gallery Popup images are used within the project.
In an earlier tour version, I’d used images rendered in Midjourney V5 and thought updating them with new Midjourney V6 images would be good. In doing so, the Midjourney - Photoshop - Magnific workflow delivers exceptional images.
I want to share the workflow to create the “Rough and Ready” motorcycle image. The final image, 2832 x 4240 px (2:3) is shown below (figure #3)
Figure #3: Final Motorcycle image
The images below compare the retouched image from Photoshop and Magnific output of the same image after a 4x scale. The Magnific upscale shows increased detail. (figures #4a, 4b, 5a, 5b)
Note: the original retouched image has been scaled to match the output size of the Magnific output
Figure #4: Before - After
Figure #5: Before - After
The before and after slider example below will show the differences between the edited Photoshop version and the final Magnific upscaled version.
Midjourney - The starting point
Midjourney will be my starting point because I don't have any stock motorcycle images.
In Midjourney, I’ll start a new /imagine prompt and use the prompt words, “classic motorcycle parked at old gas station::2 natural lighting::1 wide angle lens::2 dof”.
This is the same prompt I used for the old V5 versions. The V6 version uses a different prompting methodology, but I wanted to see what it would do with the old prompt, and these are the four images it rendered, though I’m not sure how the truck got in there! (figure #6)
Figure #6: 4-up renderings
I like both top images and have used them for the final gallery. I’ll start with the upper left motorcycle in this walkthrough by upscaling it. (figure #7)
Figure #7: Upper left image upscaled to 2368 × 2016 px
I liked the result, but the image is cropping too close to the bike handle on the left-hand side. To add additional imagery to the left in the upscale window, I selected the “Pan Left” function.
The result was just what I was looking for and I was happy with the result. The 4-up image size was 2368 × 2016 px. (figure #8)
Figure #8: 4-up image after additional imagery is added via the “Pan Left” option
My preference was the version with the red container in the open doorway, which I decided to use. I opened the 4-up image in a browser window, saved it to my desktop, and opened it in Photoshop 2024.
I defined a crop area of 1184 x 1008 px in Photoshop and positioned it over the bottom right version. (figure #9)
Figure #9: Bottom right versipon
After positioning the crop I confirmed the crop and this is the image I will work with (figure #10)
Figure #10: Bottom right version cropped
Note: Midjourney is amazing but it doesn’t get everything right. In real life this bike would be leaning a bit to our right rather than being slightly left leaning. So I need to change the image to lean the bike a little to the right.
The first thing I did was draw a quick outline around the bike (figure #11)
Figure #11: Bike outlined
Then I copied and paste the bike into a new layer (figure #12)
Figure #12 Bike copied and paste into a new layer
Now, I need to remove the motorcycle in the “Background” layer to have a clean canvas behind the copied version.
Using the Layer 1 image, I reproduced the selection and applied the new Photoshop “Generative Fill” feature (leaving the prompt field empty).

From the generative fill options, I selected the one I thought provided the best background.
Note: Generative fill has been one of the most important features to hit Photoshop for years as, in seconds, it removes the motorcycle completely. (figure #13)
Figure #13 The amazing results from Generative Fill.
With the old motorbike gone, I turned on Layer 1, selected the cutout and then rotated it so it had a slight lean to the right, looking as though it was putting more weight on the kickstand.
To keep the cutout aligned with the background, I set the rotation point to the kickstand, where it touches the ground. (figure #14)
Figure #14: Motorbike rotated slightly to the right.
Now all I had to do was to use the selection to make a mas and then blur the edge of the mask and do a little painting to clean it up. (figure #15)
Figure #15: Edge of the layer mask using Gaussian Blur
At this point, I realised I needed more foreground to lift the motorbike higher in the image. My final output ratio is 2:3, so I set that in the crop ratio boxes and resized the crop to extend beyond the image to add some extra space at the bottom. (figure #16)
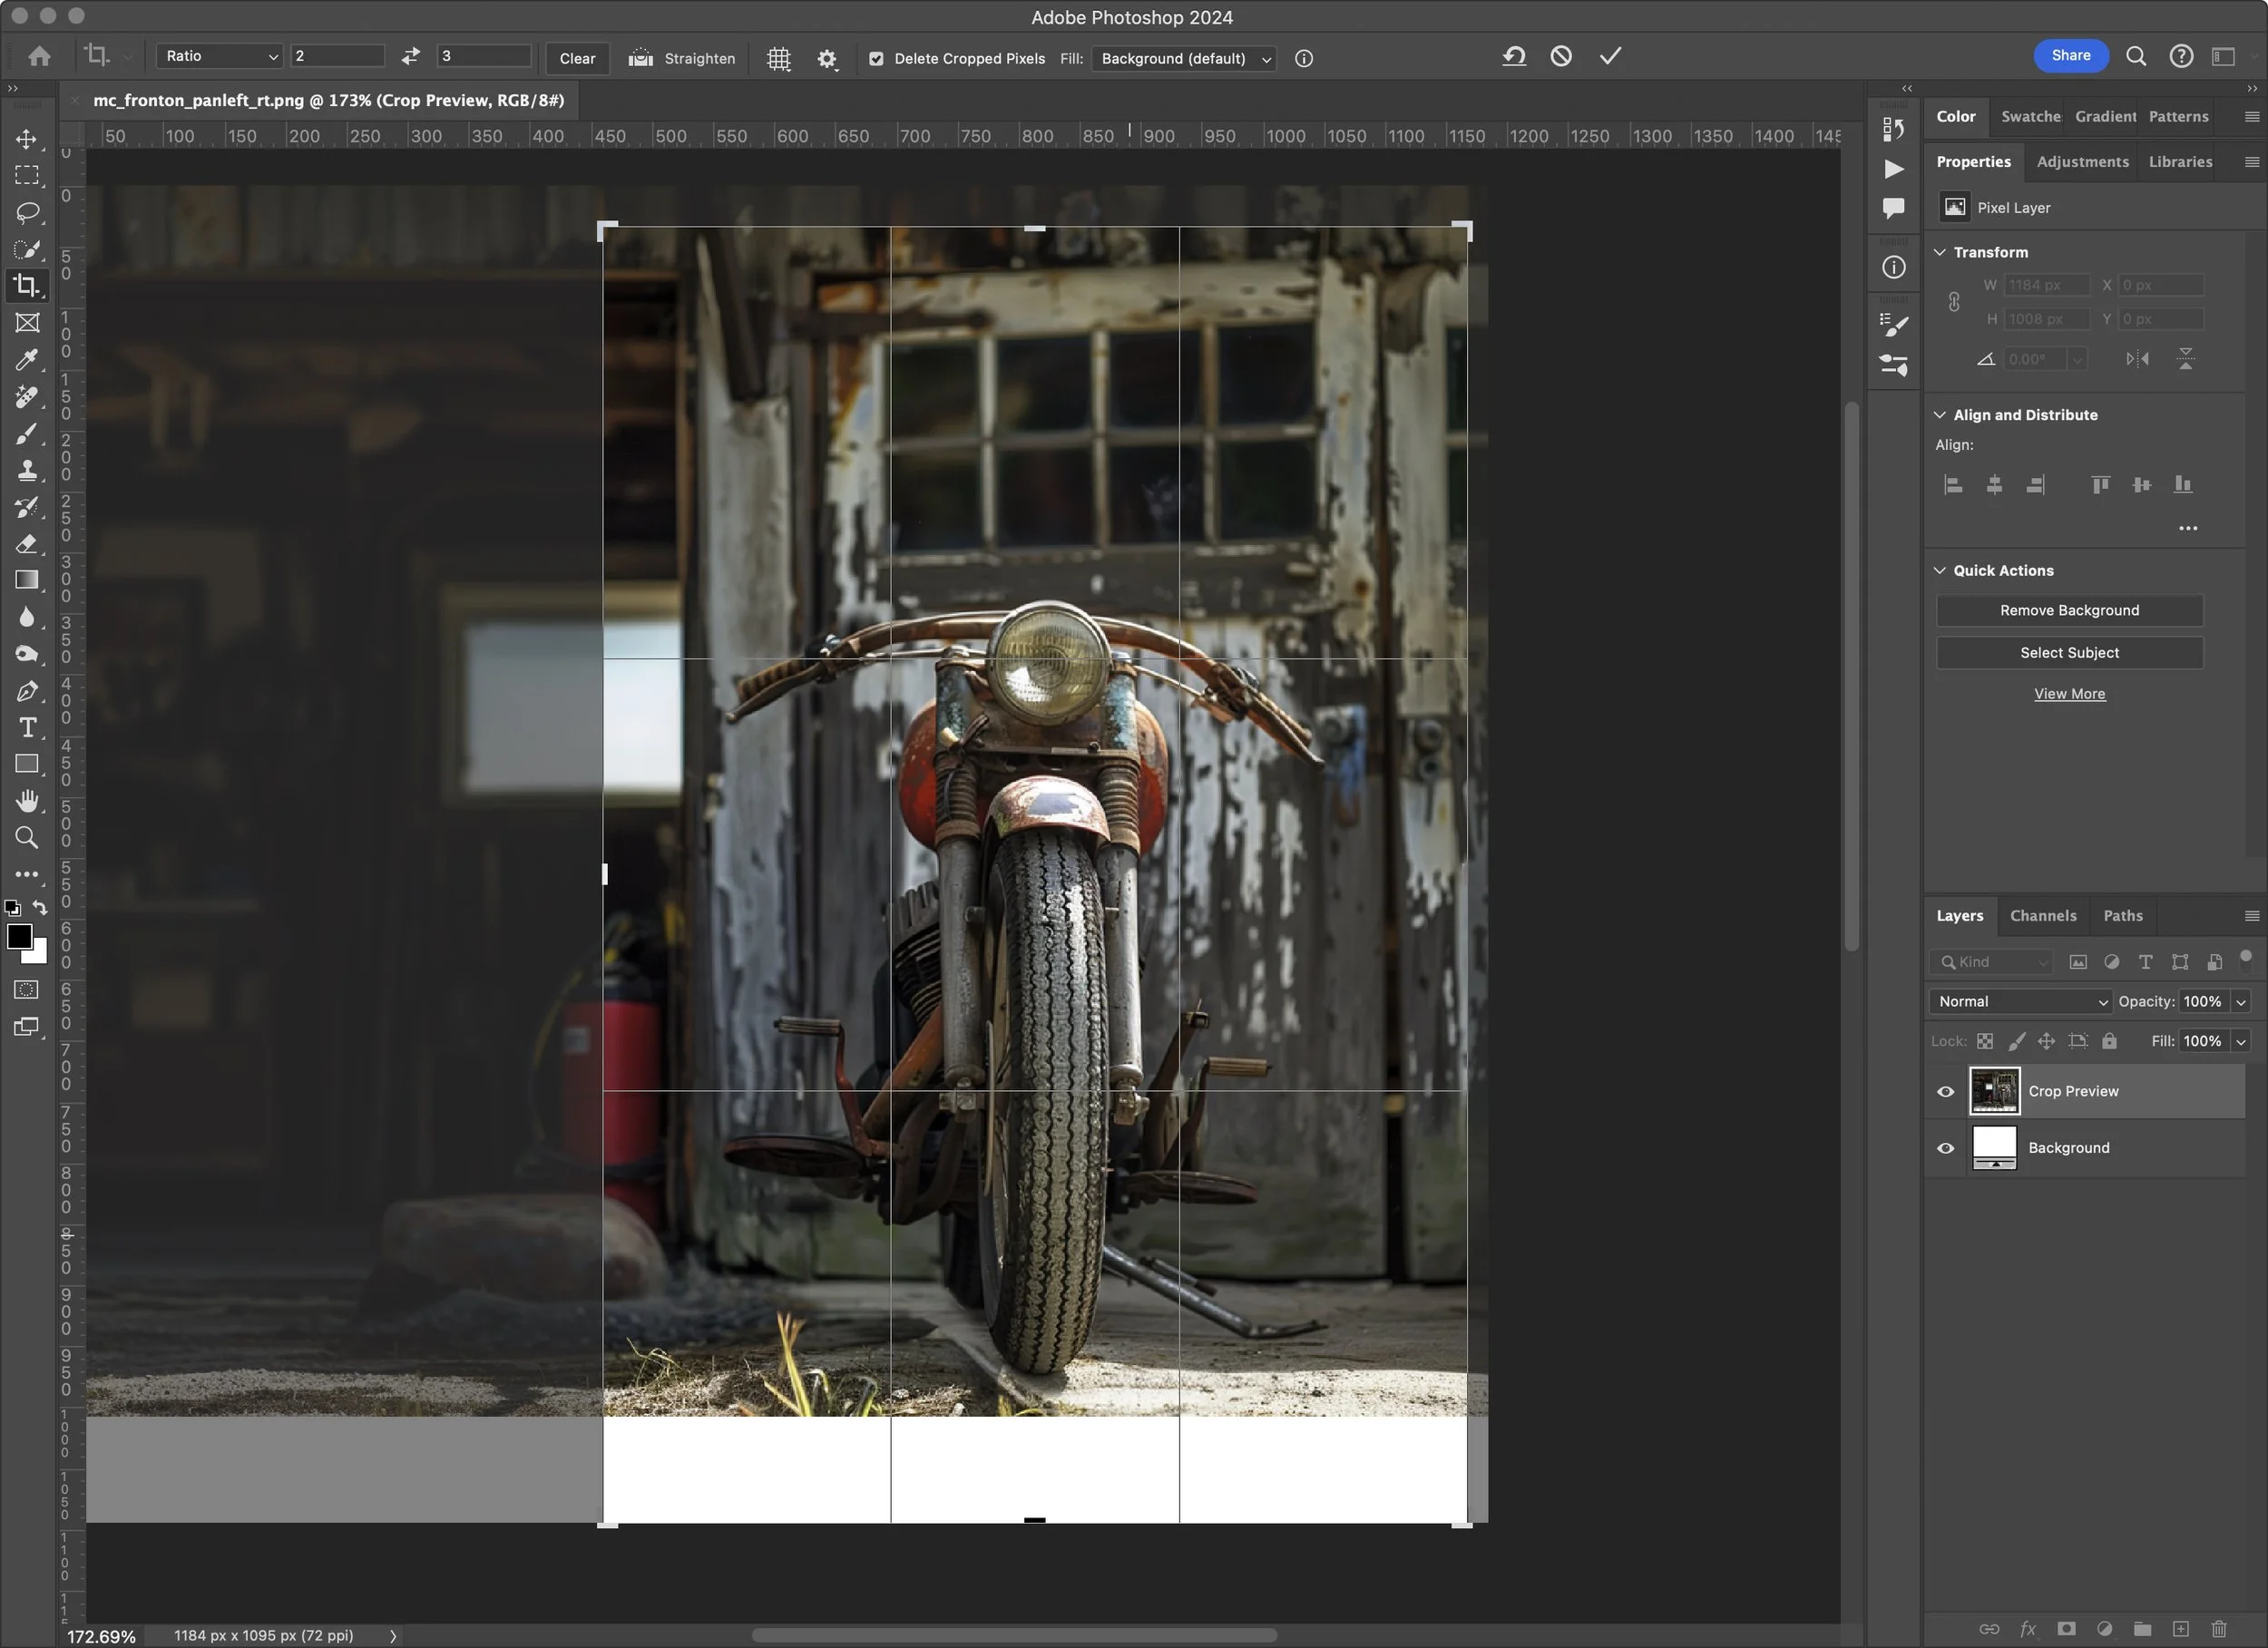
Figure #16: Extending the crop beyond the image
Note: This action automatically changes the contextural bar and shows the option “Generative Expand”
Selecting “Done” generated three more versions for me to review and choose from. In this case, my preference was version number 2. (figure #17)

Figure #17: Final image ready to be upscaled
Now, the motorcycle is placed higher in the image, and the foreground is looking good. I flatten the image and save it as a .png, ready to head to Magnific for upscaling.
In Magnific, I drag the image into the Input image area and apply the following settings:
Scale factor: 4x
Optimized for: Film & Photography
Prompt: empty
Creativity: 1
HDR: 0
Resemblance: -1
Fractality: 0
Engine: Automatic (figure #18
Figure #18: Configuration panel
Note: This will give me a final output size of 2688 x 4032 px at a cost of 15 tokens or a cost of $3.54 AUD on my current monthly Pro plan.
The final step is to click on “Upscale” and let Magnific do it’s thing. After rendering you can use a comparison slider to veiw the “Before” and “After” versions. (figure #19)
Figure #19: Finished Upscaling showing the before and after versions.
Now it’s just a matter of downloading the image and adding it into the gallery element of the Virtual Tour.
If you have any comments you can leave them on this page or contact me at tony@tonyredhead.com
